Monday, November 19, 2012

Simple Mini Bag Tutorial

As I promised, I'm going to show you how I made my mini bag cupcake topper.


What I did was so simple, you could make them more glamorous by putting 1mm silver dragees on both ends of the bag handle. You can paint it any way you want, make a quilt impression, or maybe change it's shape into square, oblong, rectangular or even tube shaped. It was inspired from the bakehappy.blogspot tutorials. How I wish I had so much time to make different designs so I can show all of you my design ideas. Maybe when I have the time to make, I'll definitely going to show it on my blog.
So here it is... my mini bag cupcake topper tutorial.

Materials:
Fondant with tylose(any color u like) brown and faint pink
water brush
exacto knife
tracing wheel(with the stitching tool on the other side)
round scallop cutter

Cut fondant and turn it into a ball so you can see if they are all look the same in size.
Flatten the ball slightly with your palm.
Stand the flattened ball and then press the sides.

Roll fondant into a thin rope.

Attach the rope on both sides of the bag.

For the zipper, I used the same fondant rope.

Flatten it using your finger.

to make a zipper design, use the tracing wheel tool or a knife fondant tool.


For the handles, cut fondant ropes with the same length (about 1.5" or slightly longer than that)

Flatten both ends using your finger and bend them forming a 'U' shape.

Attach the handle. At this time you can add silver dragees on both flattened ends of the handle. 
Or you can add miniature flower or heart fondant at the center of the bag. Paint it anyway you want.
Just use your imagination and creativity too. :)

 I took a picture of the bags with my fingers too because I want to show you how small it is.

For the base, cut white fondant using the round scalloped cutter.


So that's it! So simple right!? Next blog....my tutorial on how I made the LV Bag cake topper.

Friday, November 16, 2012

Every Woman's Weaknesses: Bags & Shoes


     I admit that I'm a bag and a shoe lover, but I don't spend too much cash buying them. Whenever I go to the mall,   bags and shoes are the first thing that comes into my mind though they are not in my shopping list. Heels? Flats? Clutch bag? Shoulder bag? Oooooh! so many choices...that is why sometimes I end up buying nothing! Haha! My husband gone crazy waiting for me :D
 It's been a long time since I blogged... and here I am again to share some of the things I've been preoccupied with. Never would've thought that I would finish 2 fondant cakes,65 cupcakes with fondant toppers and 100 cupcakes in just 4 days. I was deprived of food and sleep and I was glad and relieved I made it through. I'll post the mini bag cupcake topper, shoe cake topper and the LV Bag cake topper tutorials on my next blogs.

5th shoe cake


 LV Bag

 Lace details with pearls

Cupcakes: Monogram, mini bag, mini shoe and ruffles


 And another shoe for a debut party. My 6th shoe cake.
 (1st to 4th shoe cake shown at the end of this blog)


and one hundred cupcakes


     And here's the step by step pictures on how I made the mini shoe cupcake toppers.

Materials needed:
Gumpaste or fondant(any color u like) with tylose powder
small rolling pin 
exacto knife
quilting tool with tracing wheel
small flower cutter
water brush
fine brushes
gold/bronze luster dust
vodka
palette
small shoe pattern about 1.5"
ruler
shortening
cornstarch/powdered sugar for dusting


Shoe pattern

I improvised a rack made out of manila folder for drying.
 Cut out strips about 4mm wide and 1.5cm long for the shoe strap.
   

Make a cone shape for the heel.


you may paint the flower with gold luster dust mixed with vodka


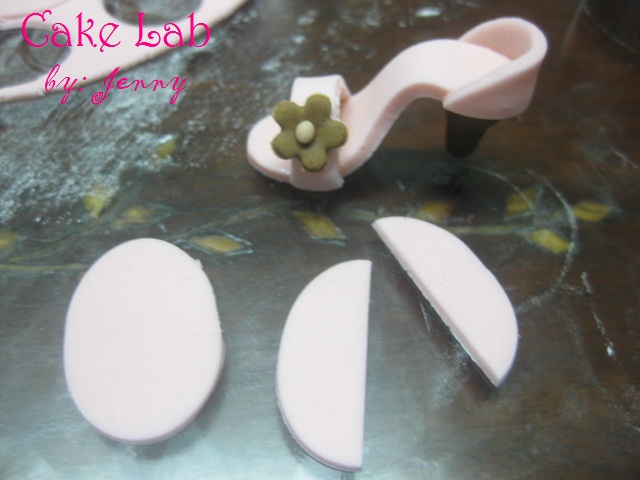
 If you have a mini oblong cutter, use it and cut into half.

let it dry

And here are some of my previous shoe cakes.

My first trial of shoe cake, I gave this as a birthday gift for my mom-in-law.

 2nd...


3rd

4th


Next blog... step by step tutorial of mini bag cupcake topper.